

How to receive in your Pokémon Sword and Shield
Note: The Pokémon game exchange system works from 1 to 1. This means that, for each Pokémon you will receive from us, you must send 1 of yours (it can be any Pokémon, it will be like a discard), as it is not possible to be sent only 1 Pokémon on one side, it is necessary that during the switching process both players select a Pokémon. For each Pokémon you bought with us, you must leave a Pokémon on your side separately to be sent in the exchange process.
Steps
1- During the normal game screen, press “Y” to open the Menu.

2- With the menu open, press the “+” button on your console to connect to the Internet. The following message “You’re now connected to the internet.” will appear on the screen after a successful connection.

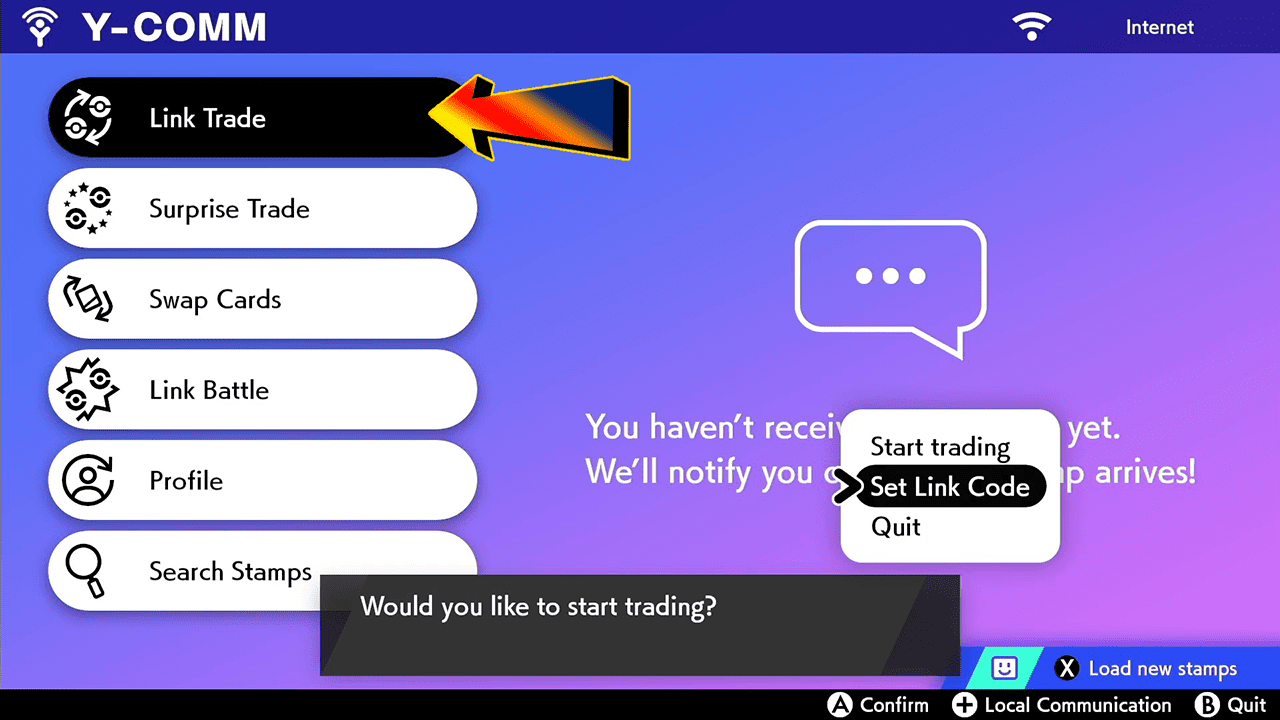
3- After connecting to the Internet, go to the first option and select “Link Trade” and then “Set Link Code”.
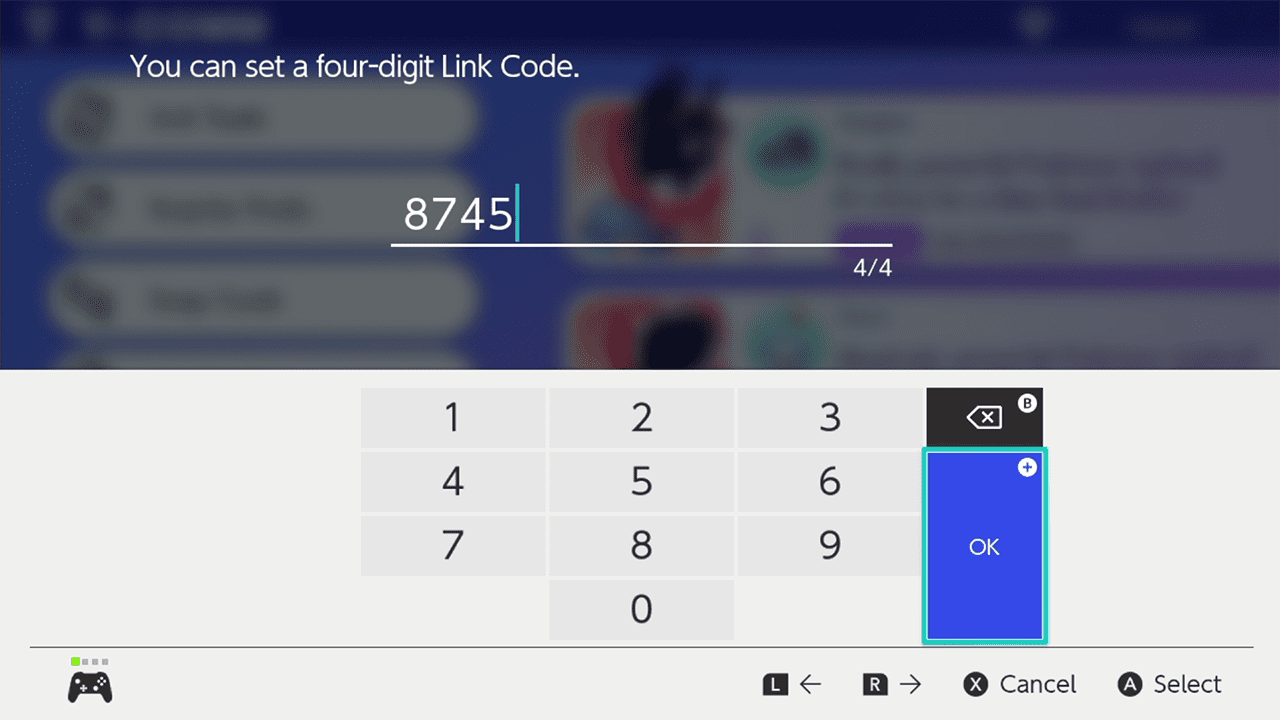
4- Enter the code that will be sent by us and click “Ok” and confirm the use of the code in the next question by clicking “Yes”. In this example we use the code “8745” which must be entered by you and our genner simultaneously so that pairing occurs more easily.
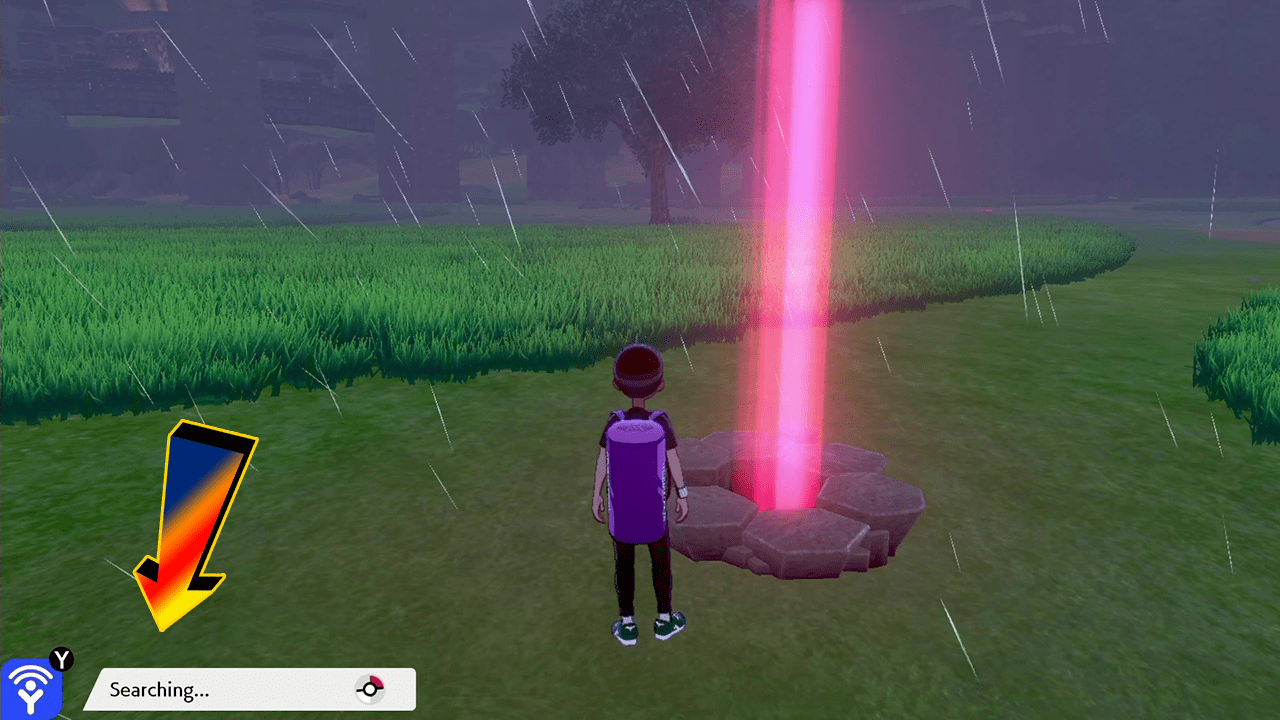
5- After confirming the code you will be returned to the game screen. Notice that the icon located in the lower left corner of the screen is now blue, indicating that you are connected to the internet (previously it was white – see photo 1). And next to the icon will be the message “Searching …” which indicates your search for the trade within the game. The waiting time for pairing to occur and the exchange to start takes a few seconds.
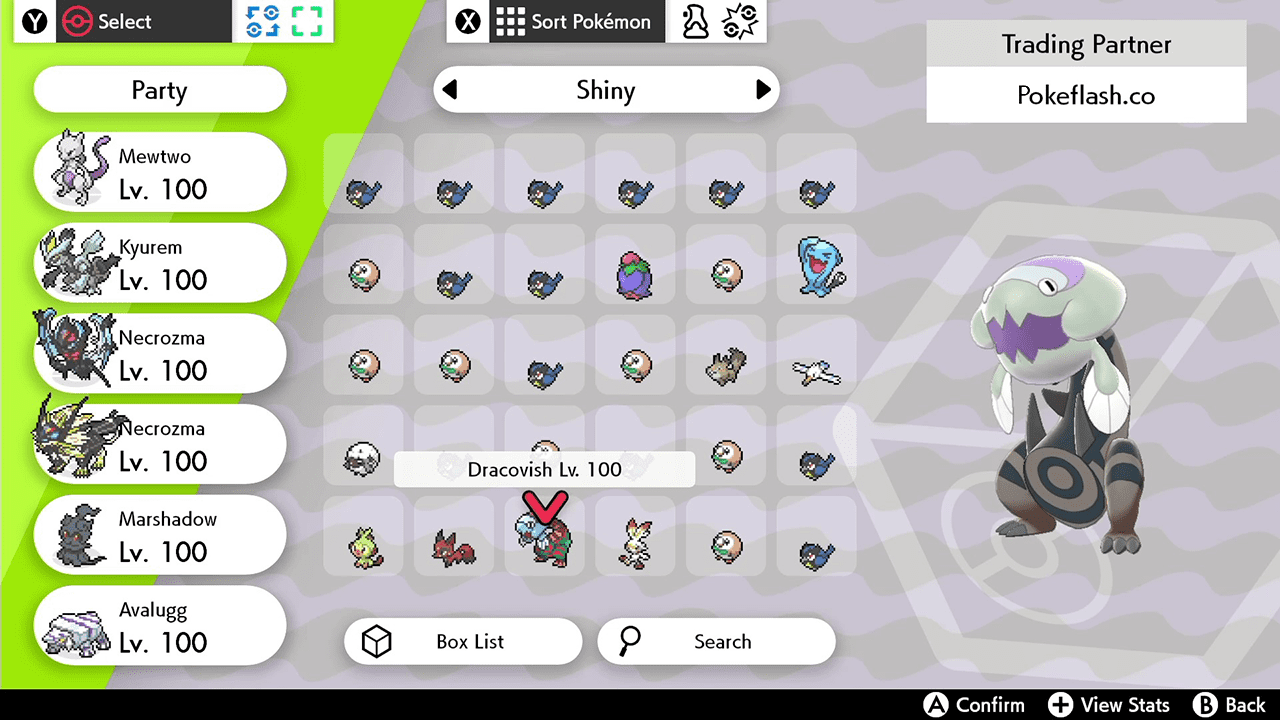
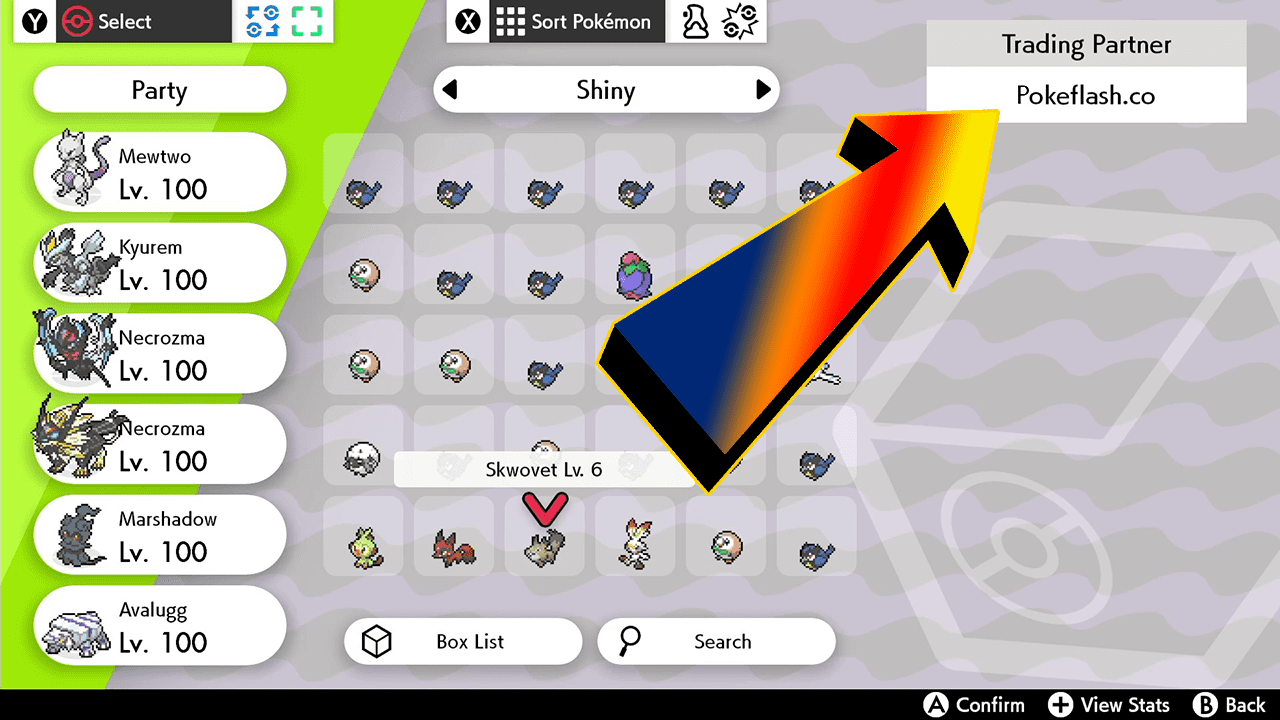
6- When the pairing occurs, a message saying that someone has been found will appear and the next you will go to the exchange screen automatically, in which will display all the Pokémon you have in the game separated by box. First of all make sure that the name (indicated by the arrow) that appears in the upper right corner is “Pokeflash.co”, as it is a game with a huge number of players and a trading system limited to just 4 digits there is a possibility that you enter with another person in the exchange is high, if it is the case just cancel by pressing “B” and confirm. After that inform us and we will try a new code.
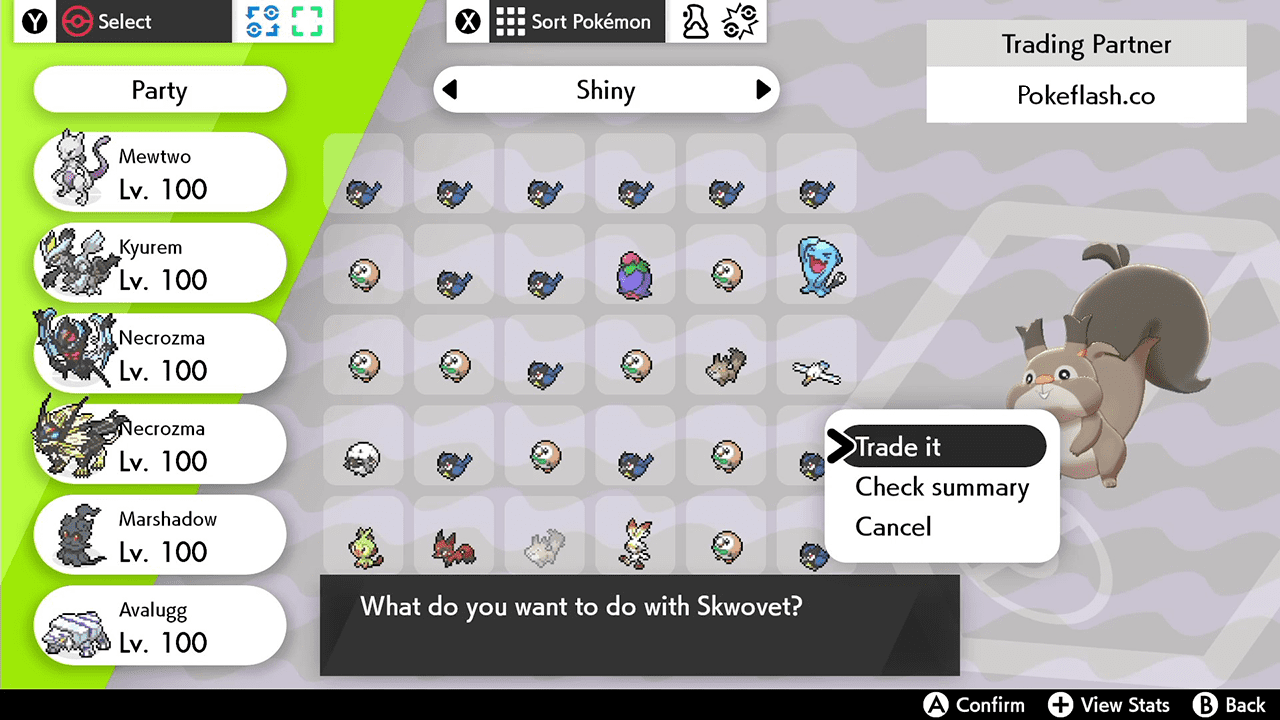
7- If the previous step is successful, so that you really enter the exchange with us, to proceed you must select a Pokémon (which is nothing more than a discard) to be sent in exchange for ours, as explained in the beginning of this tutorial. Use the Switch’s analog to indicate which Pokémon you want to send, then select by pressing the “A” button and confirm choose the “Trade It” option as shown in the image below.
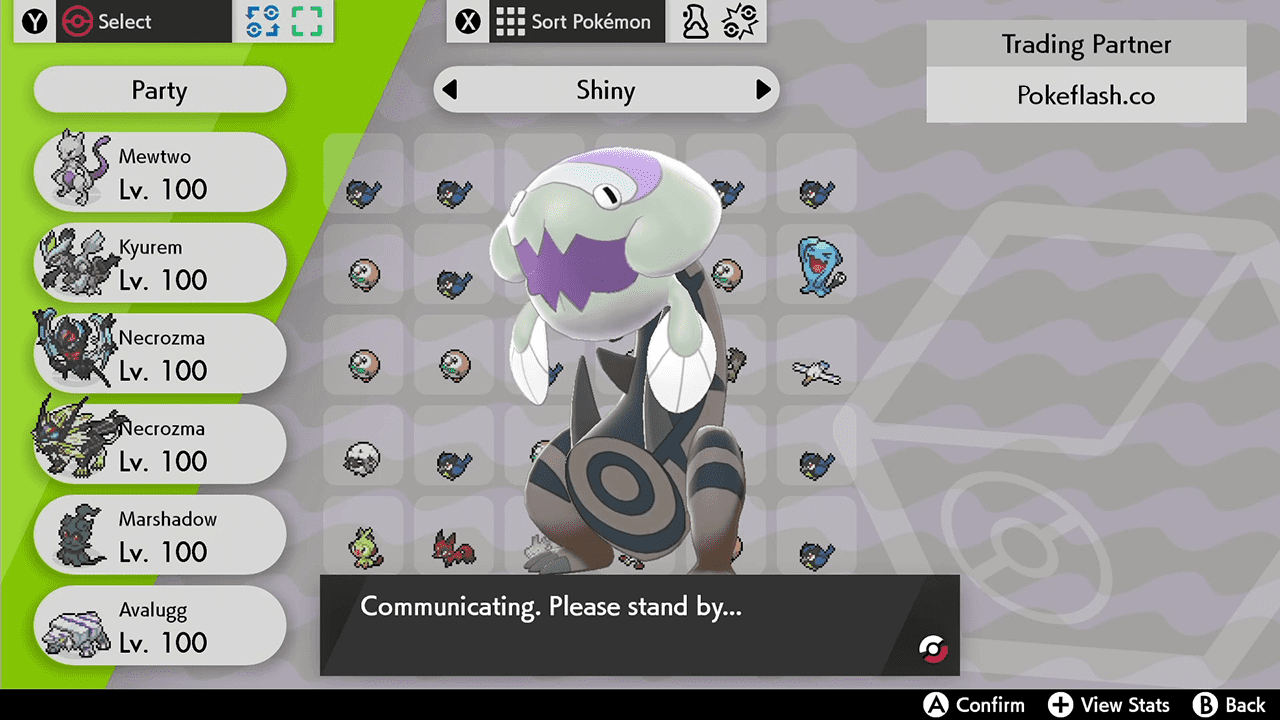
8- After both (customer and Genner of Pokeflash) confirm your choices, a brief warning message will appear, then you will be able to view the Pokémon you will receive from us (for this example we are sending a Dracovish Shiny), chosen by you on time of purchase. Now just wait, as the following screens will be automatic and will have a little animation. It is important that you do not turn off or press the power button on the console during the switching process.
9- After the end of the animation, you will return to the initial exchange screen and your game will be saved. Please note that in place of the Pokémon you sent us will be your newest Pokémon purchased from our store! If you purchased more than one just repeat the process from step 7 for each Pokémon. When you have no more Pòkémon to receive you can cancel the exchange screen by pressing button “B” and confirm by selecting “Yes”.